Custom Fields
Custom product fields are additional data points that can be added to products in an online store. These fields allow store owners to collect and display more information about their products beyond the basic details typically included (such as name, price, color, and description).
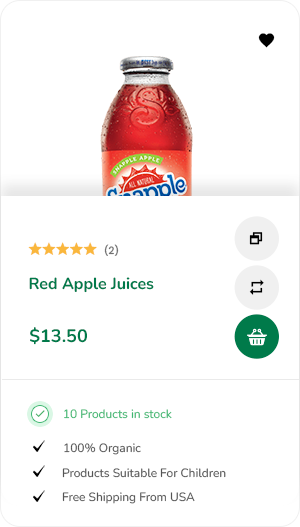
In the update on September 6, 2024, we added the feature to display custom product fields outside the product box on the homepage and category pages. Additionally, you can now show the stock status of the products.
1 - How to enable this feature?
Enable this feature in RBB WooCommerce Products.
Note: You need to call the custom fields you've created for the products in the 'Custom Fields' section. If the custom fields are not called, they will not display when hovering over the product.
2 - Configuration in Customize.
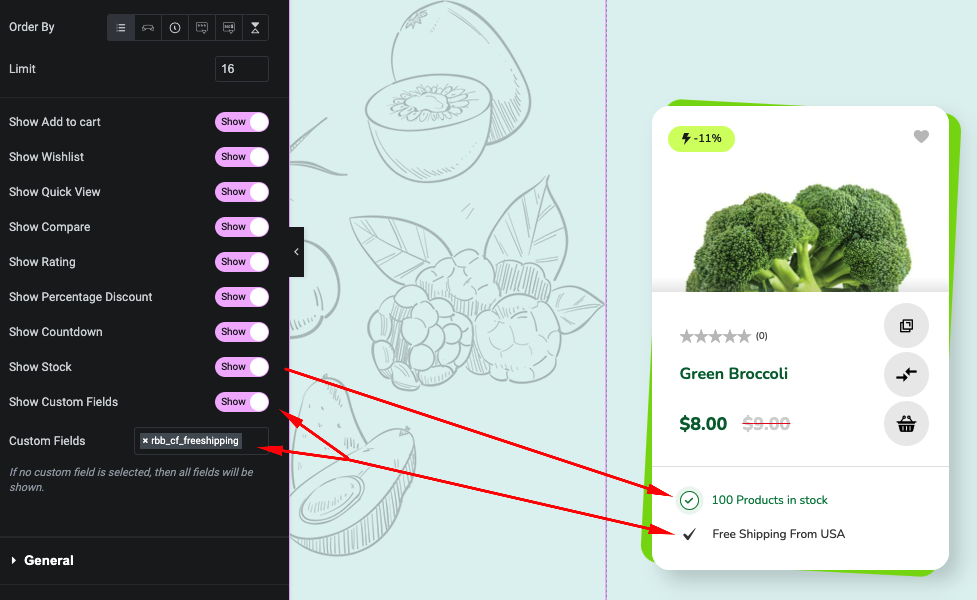
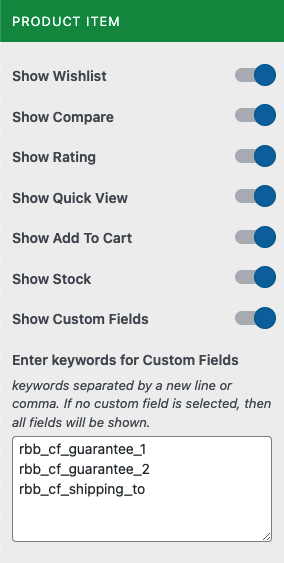
The Custom Fields configuration in Customize allows you to control whether to display or hide this feature on the Product Category page (it also affects the search results page). If no custom fields are added in Customize, all Custom Fields will be displayed by default.
From the WP Customize Panel, go to WooCommerce → Product Catalog.
keywords separated by a new line or comma. If no custom field is selected, then all fields will be shown.
Enable Custom Fields for Products
To enable Custom Fields for products, please follow the below steps:
Go to WP-admin > Products
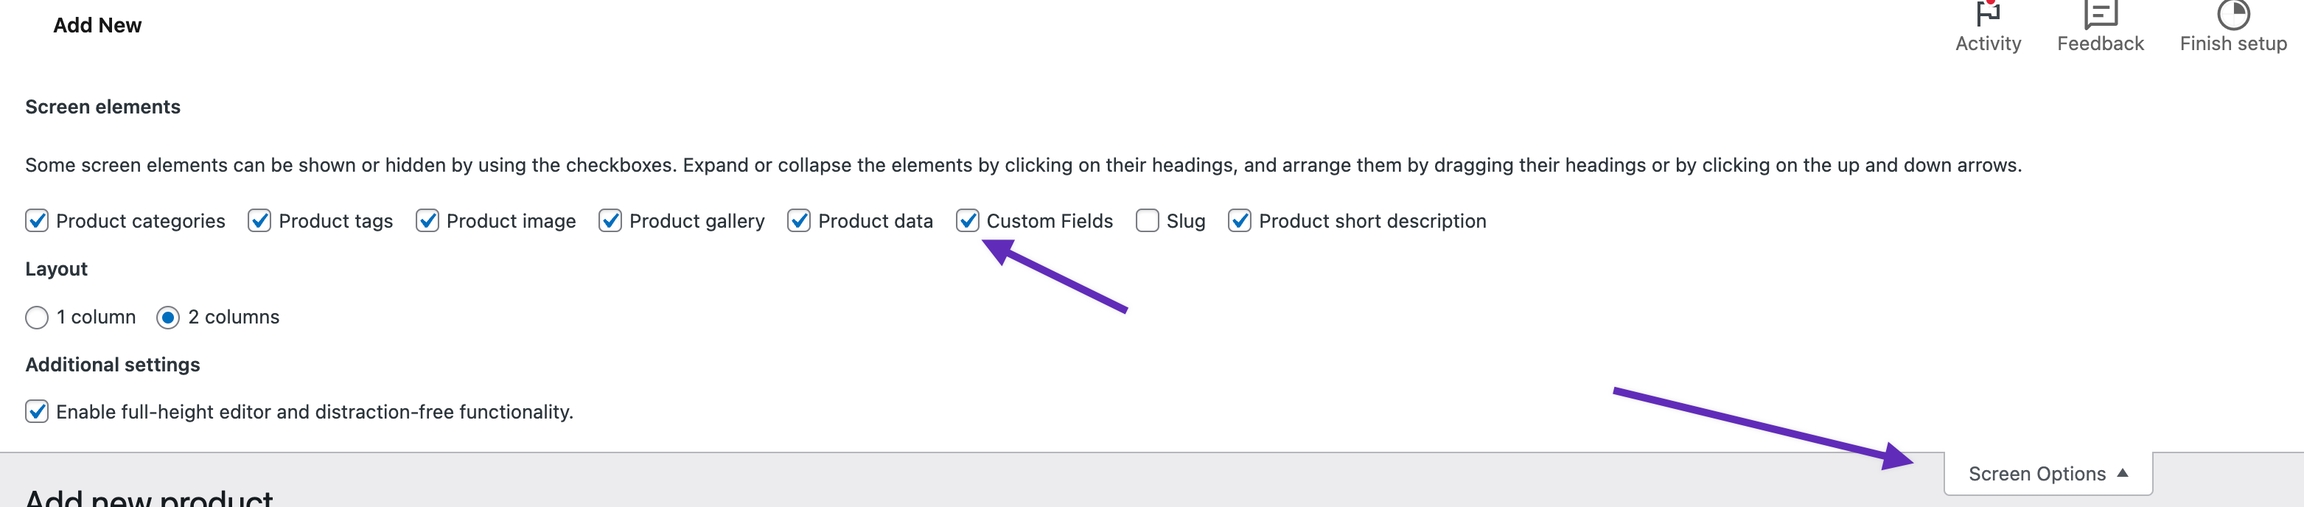
Choose to add a new product using the “Add New” button or “Edit” an existing product
On the product edit page, click the “Screen Options” at the top right corner of the screen.
In the dropdown, find and check the “Custom Fields” option to enable it for the products
Add Custom Fields to a Product
After enabling the custom fields for your products, you can now add custom data to your products:
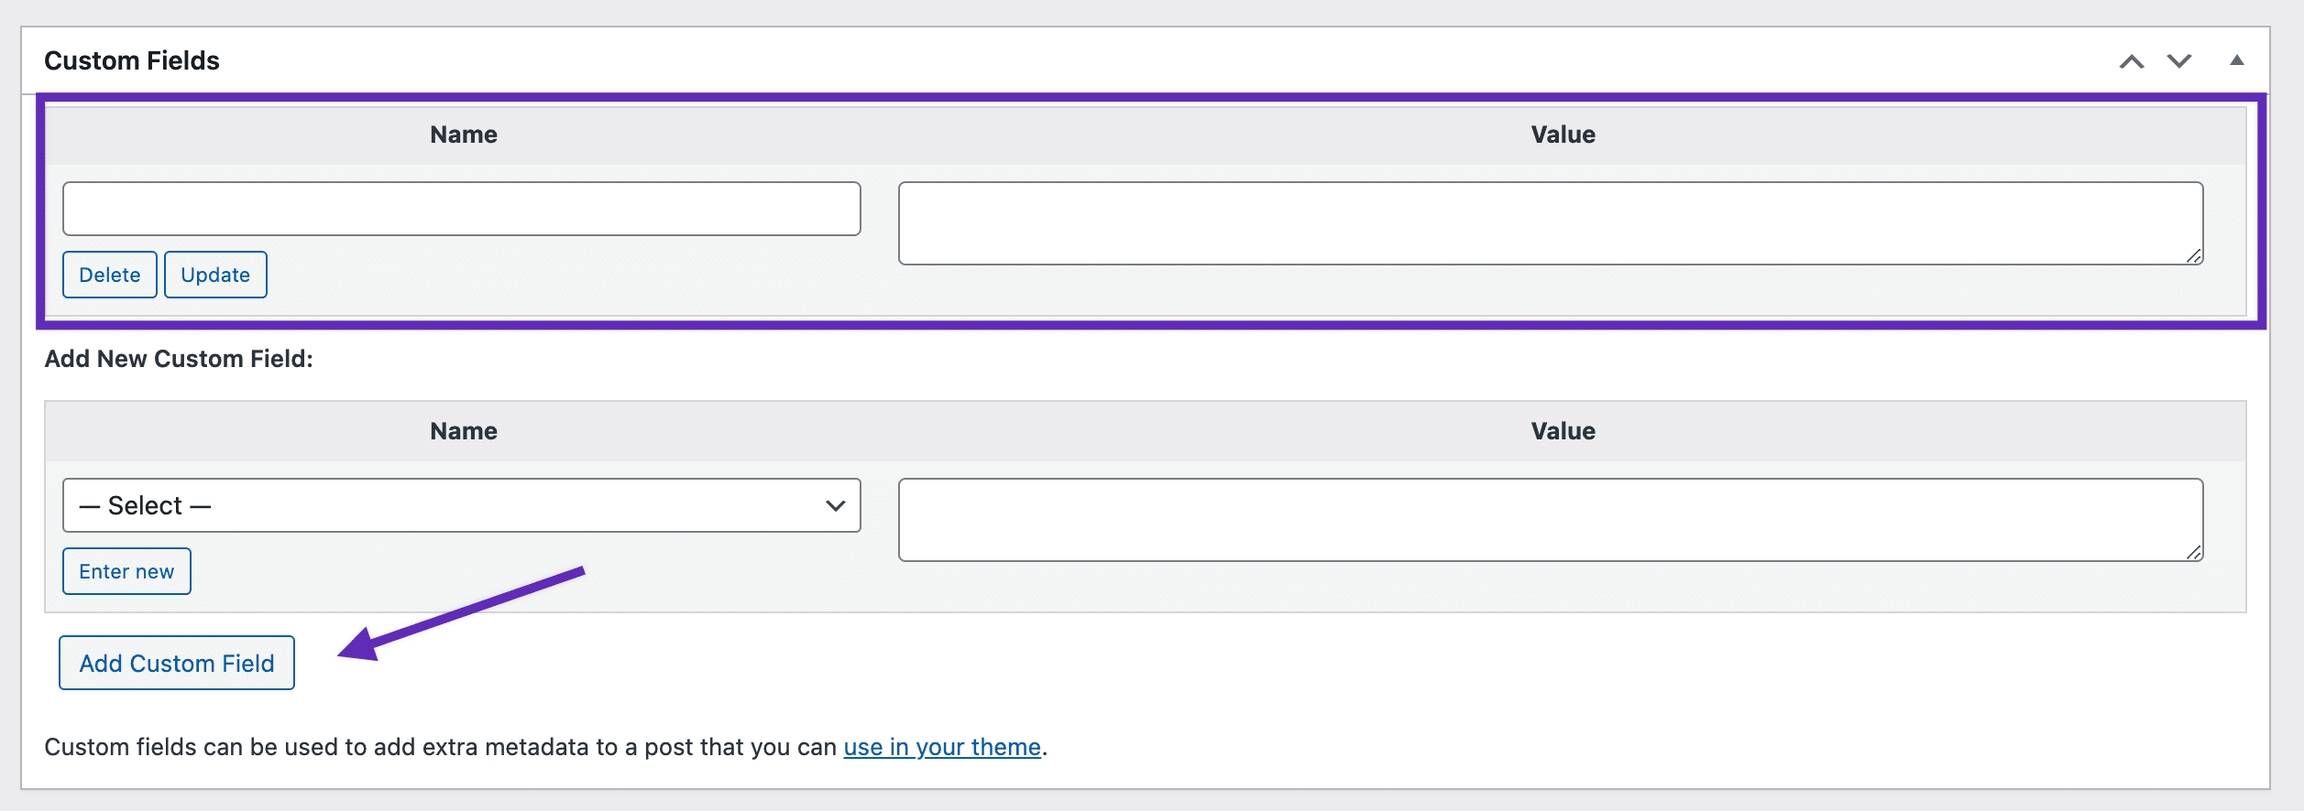
On the same product edit page, scroll down until you find the “Custom Fields” section at the bottom
To add a new custom field, click on the “Add Custom Field” button to create a new field
Name your custom field in the “Name” input box. This name will be used to reference the field programmatically in your theme or site
Enter the value for the custom field in the “Value” input box. This could be any piece of information relevant to the product, such as additional specifications, unique identifiers, or custom notes
Once you’ve added your custom fields and filled out their corresponding values, make sure to save or update the product
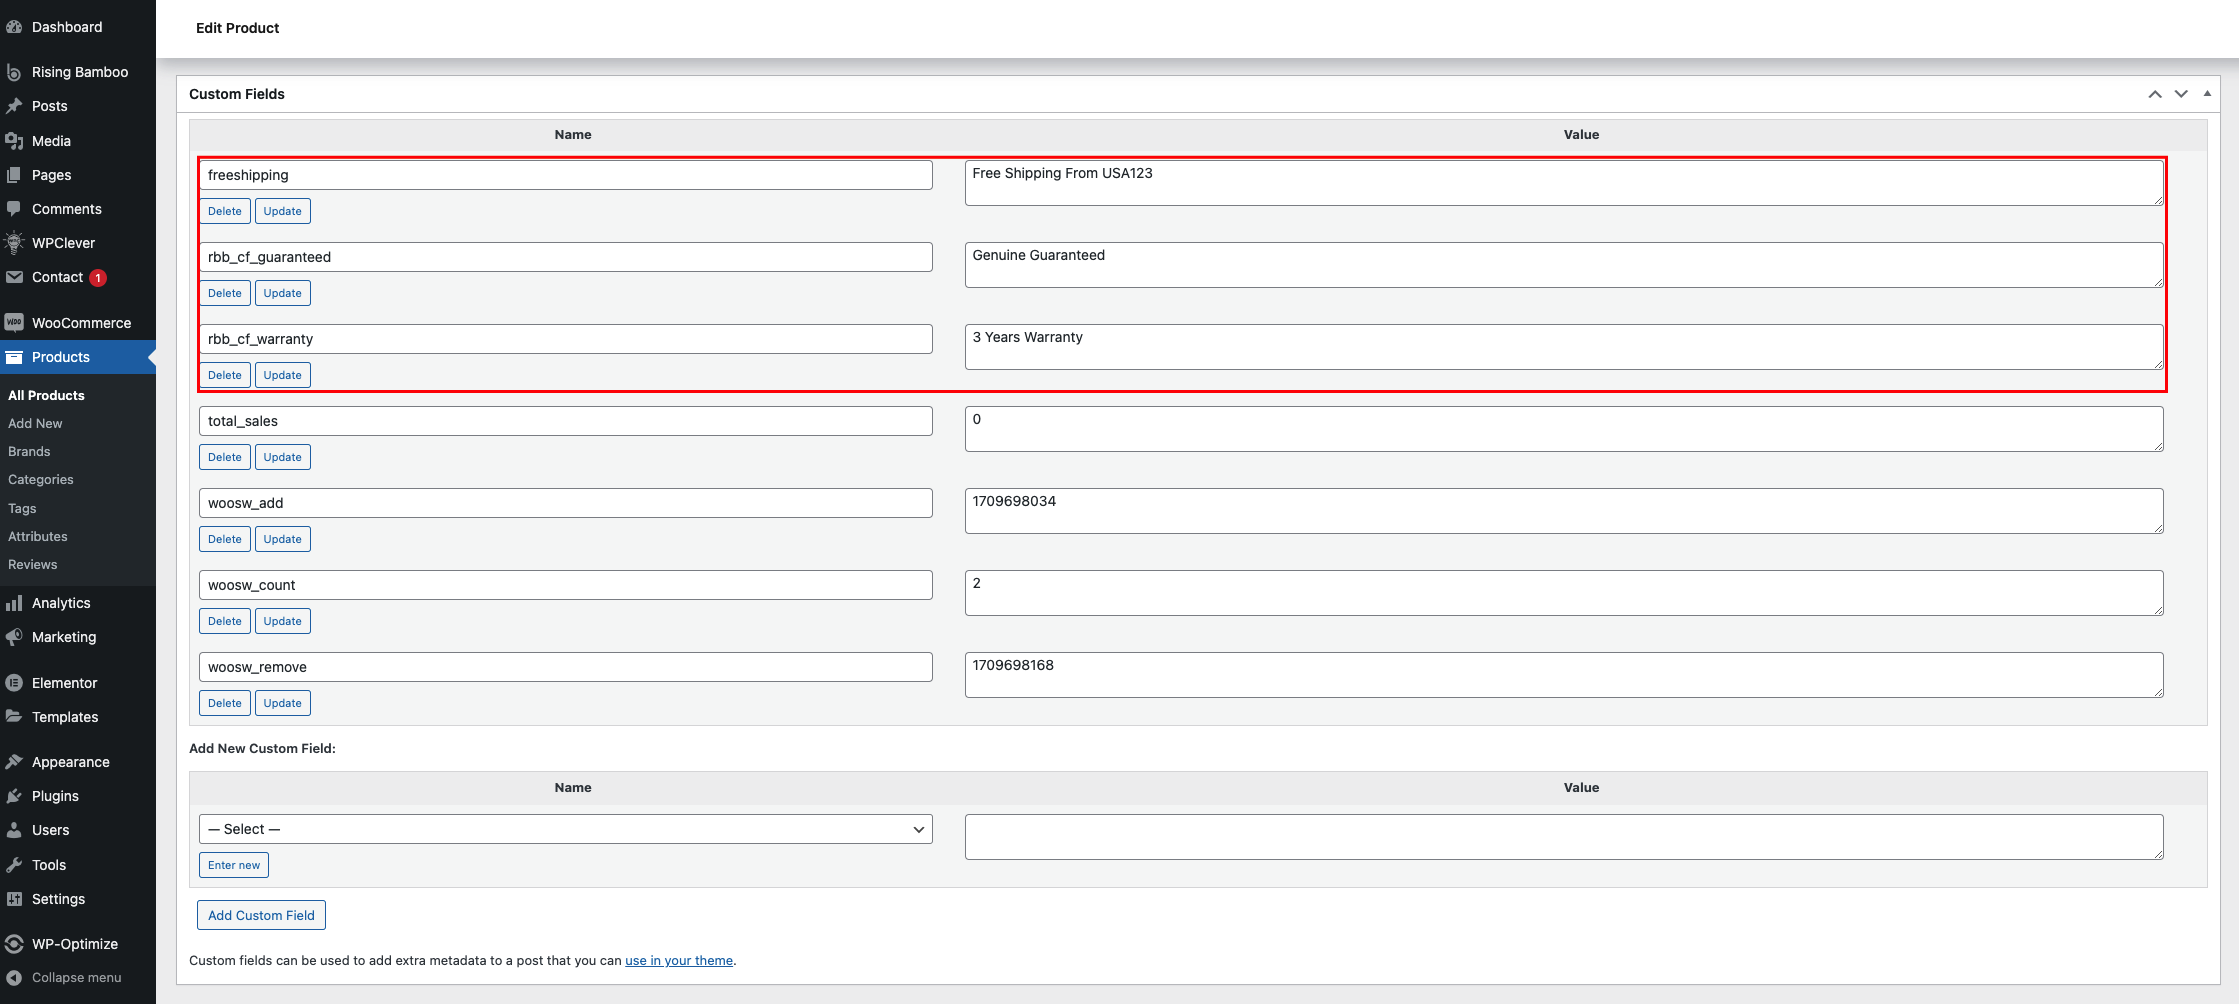
These are the custom fields we created to be used in the Product block. Here's a tip for finding custom fields more efficiently: Since a product has many automatically generated custom fields by WooCommerce, it's helpful to name the custom fields you want to display in a unique way for easier searching. For example, we name our custom fields with the prefix 'rbb_cf' (e.g., rbb_cf_guaranteed, rbb_cf_freeshipping, rbb_cf_warranty). When searching, simply type the first three characters 'rbb' to quickly find the relevant results.