# Compare Plugin Setting
## How to configure the Compare Plugin?
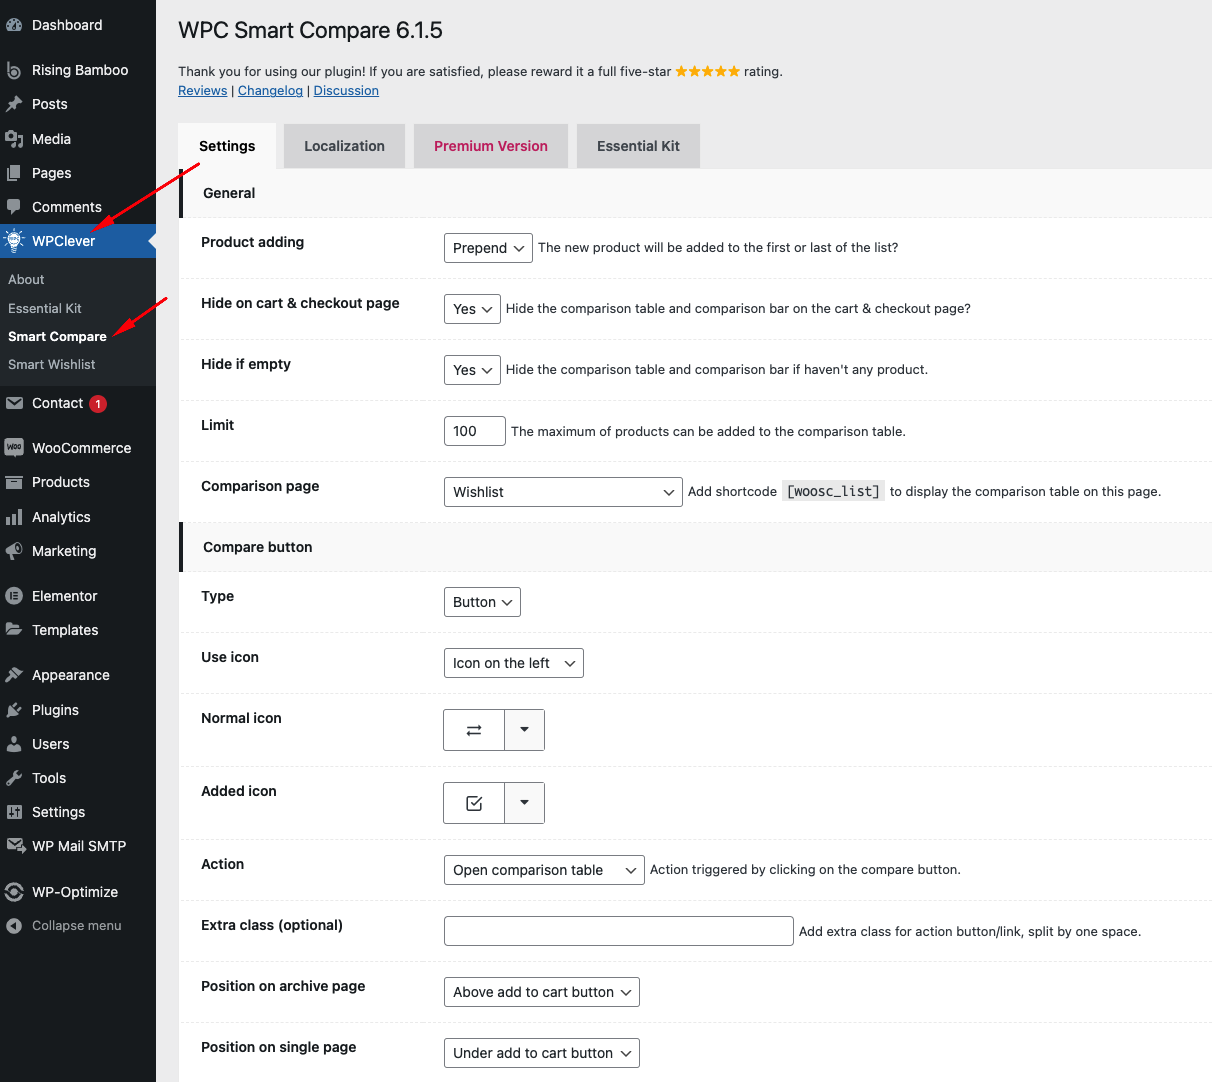
**Step 1**: From your **WP Dashboard,** Go to **WPClever** → **Smart Compare****.**
**Step 2:** At the tab Settings, you will see various options and their descriptions; you need to read them and follow along.
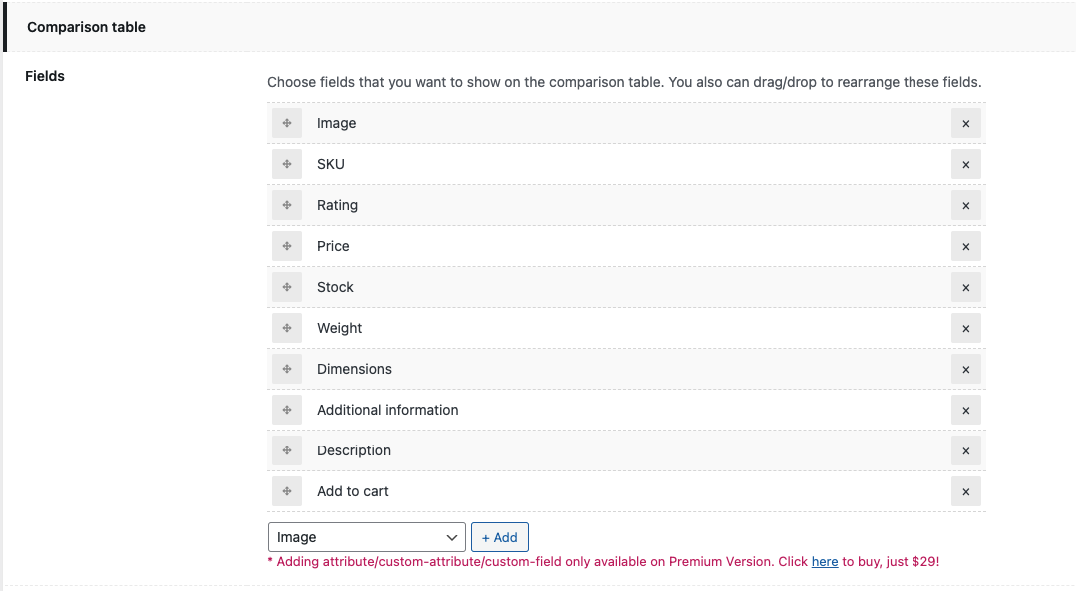
**Step 3**: In **Comparison table** settings, you can select fields attributes, or even create custom fields to compare among products.
**Step 4:** Click Update Options after finishing your setup.\
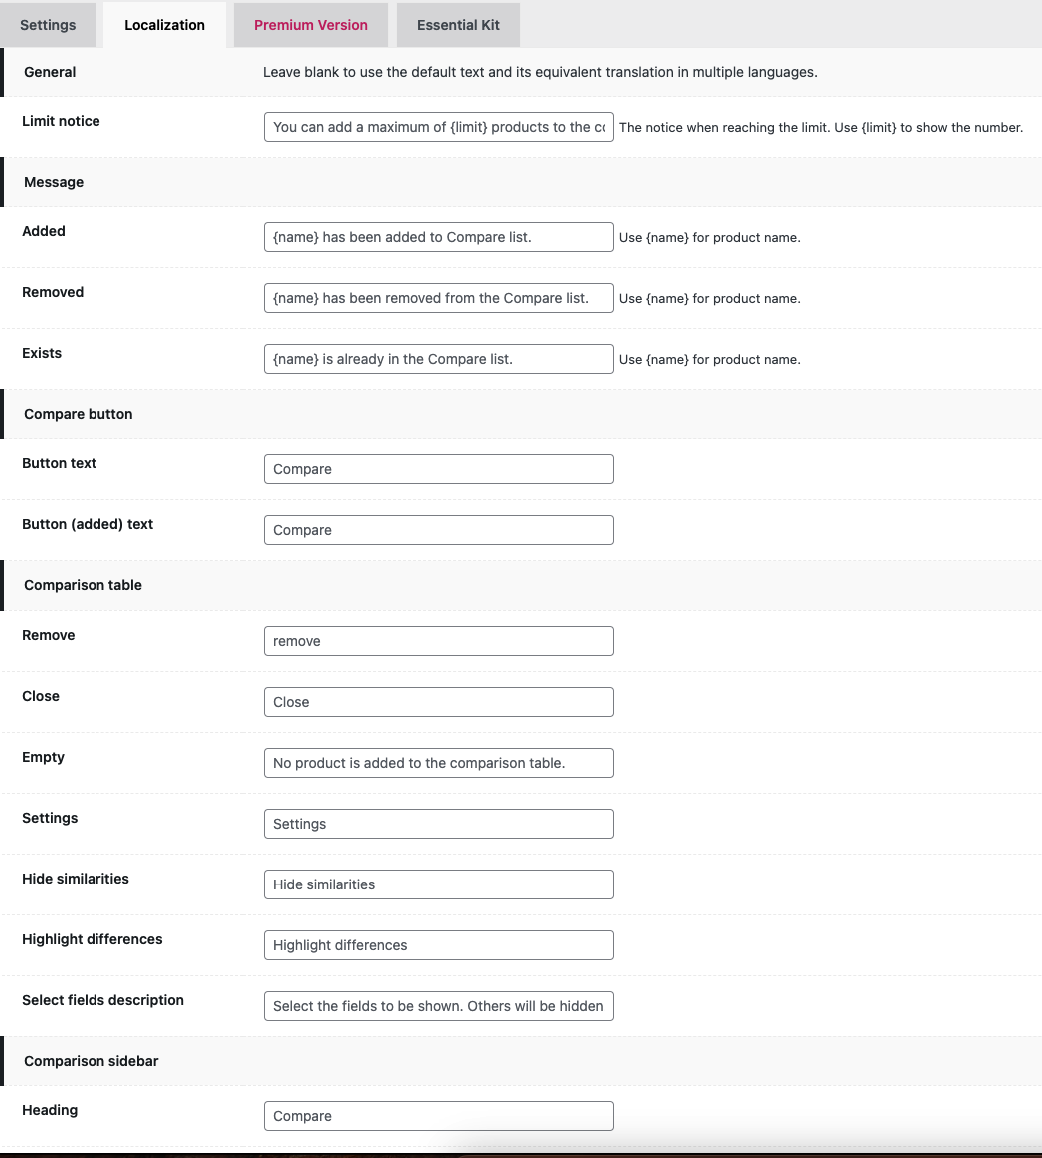
**Step 5:** Move to the **Localization** tab; here, you can type in your own language displayed in the front-end for all words and phrases and instruction text.